Your cart is empty.
Origami Tulips

Origami Tulips


Discover the art of origami by making delicate tulips. Our tutorial guides you through the steps to create these elegant paper flowers. Add a touch of beauty to your decor or gift them as a handmade present.
How to complete this tutorial step by step?
Etape 1.
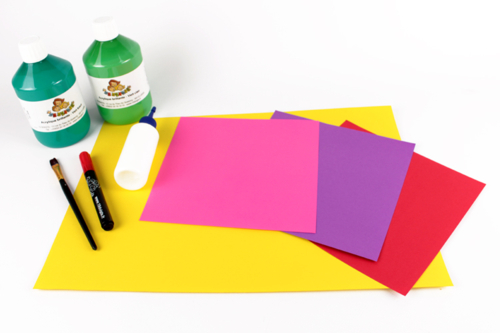
Necessary materials:
- A large sheet of paper
- Several square sheets of paper in matching colors
- Glue
- Paint / Paint markers
- Brush
Etape 2.

To create the paper tulip, start by folding a square sheet of paper in half diagonally.
Etape 3.

Place the base of the "triangle" towards you and fold the right side upwards as shown in the picture beside it, slightly offset from the tip of the triangle.<\/p>
Etape 4.

Fold the left side in the same way.
Etape 5.

Turn the fold so that the 3 points are oriented upwards.
Then fold the bottom point and the side points as shown in the adjacent photo.
Etape 6.

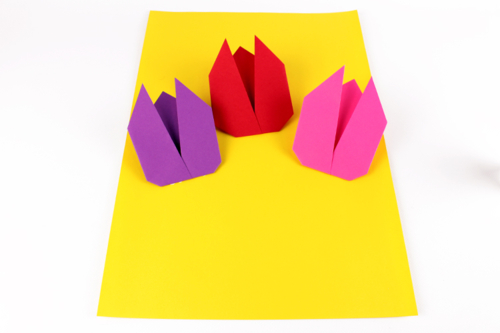
Make more tulips by varying the colors.
Etape 7.
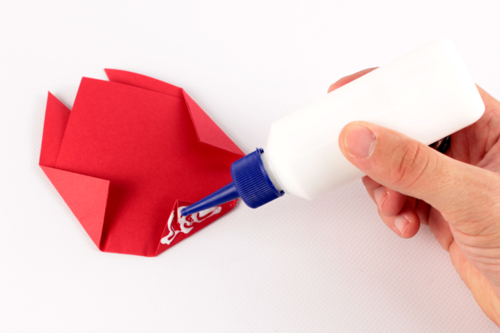
Apply glue to the base of the tulips and then place them on the large sheet of paper.
Etape 8.
By applying glue only to the base of the tulip, you will achieve a stunning 3D effect.
Etape 9.
Once the paper tulips are glued, paint the stems and the decor of your picture.
Etape 10.
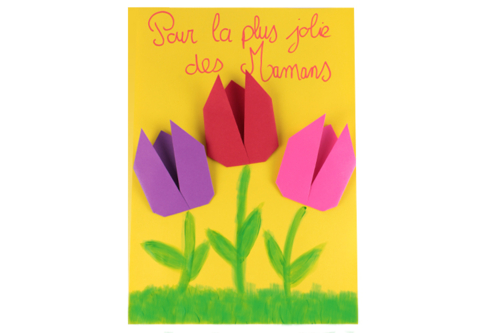
Add a little message to give this beautiful painting to someone you love.
The products used:
The products used:


1,99€ (either 0,66 € / pc)
Available
Other tutorials on the theme "Mother's Day Tutorials"
-


Heart frame Father's Day
C17797View 7308 time


-


Bottle Opener Set
C17389View 4204 time
-

Heart Letter Holder
C13164View 14460 time
-

Heart Letter Holder
C13163View 11706 time
-

Masking Tape Bracelet
C12689View 14275 time
-

Flower Pot for Mom
C12677View 21465 time
Customer review
Give your feedback
Origami Tulips
Be the first to share your review of this product.
Post a review