Your cart is empty.
Christmas Tree Decoration
Christmas Tree Decoration


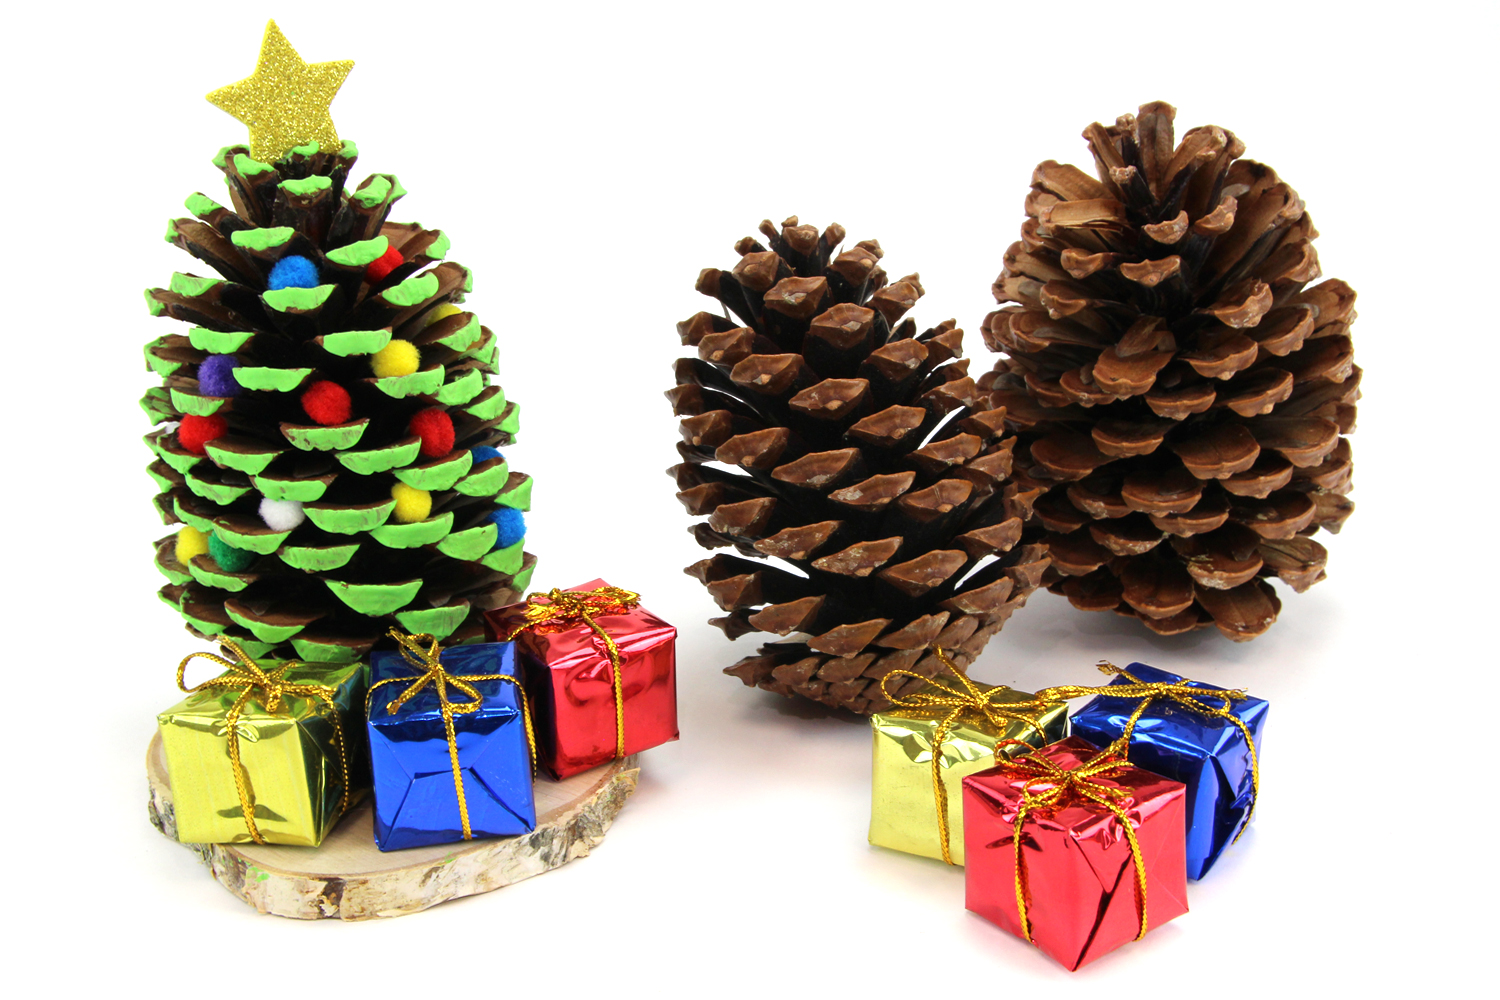
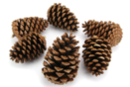
Create an enchanting scene on a log, using real pine cones!
This creative tutorial will guide you in making an adorable little scene on a log using pine cones to create beautiful trees. It’s a perfect activity for nature lovers and those looking to add a rustic touch to their indoor decoration.
Activity to be completed with the help of an adult.
How to complete this tutorial step by step?
Materials
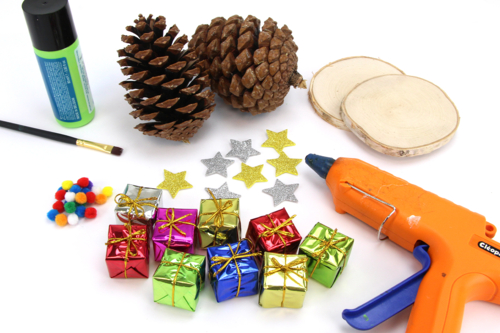
To make a beautiful Christmas tree you will need:
- a large pine cone
- a slice of wood (Ø 10 cm)
- decorative mini gifts
- mini pom-poms
- a star sticker
- green acrylic paint and a brush
- a glue gun
Step 1
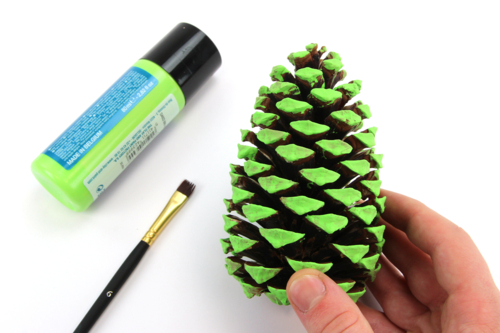
Paint the scales of the pine cone with green acrylic paint and let it dry for about 30 minutes.
Step 2
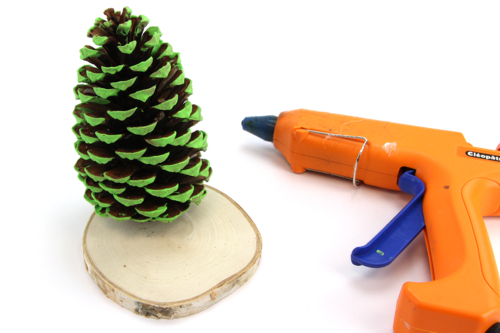
Glue the pine cone with a glue gun to the outer part of a slice of wood.
Step 3

Stick 2 or 3 decorative mini gifts at the foot of the tree.
Step 4

Stick a star sticker on top of the tree.
Step 5

Insert colored mini pom poms between the scales of the pine cone to decorate the Christmas tree.
The products used:
The products used:


Wooden Discs Ø 8 to 11 cm - 6 Pieces
Réf. 36020 - Product sheet
5,96€ (either 0,99 € / pc)
Available


Clear Glue Sticks Ø 0.7cm - Pack of 12
Réf. 04746 - Product sheet
1,99€ (either 0,17 € / pc)
Available


2,99€ (either 1,00 € / pc)
Available
Other tutorials on the theme "Christmas Tutorials"
-

Santa's Elves
C17724View 508 time


-


Mirror Christmas Baubles
C17723View 385 time

-
Christmas Lantern
C15425View 45114 time
-


3D Christmas Tree Card (Easy Folding)
C15416View 91174 time
-

Melting Snowman
C15414View 39151 time
-


Santa Claus and His Macramé Beard
C15412View 36618 time
J'adore vos idees