Your cart is empty.
Christmas Tree Embroidery Card
Christmas Tree Embroidery Card


Discover our guide to create a charming Christmas tree embroidery card. Follow our instructions for a unique and festive card.
How to complete this tutorial step by step?
Etape 1.
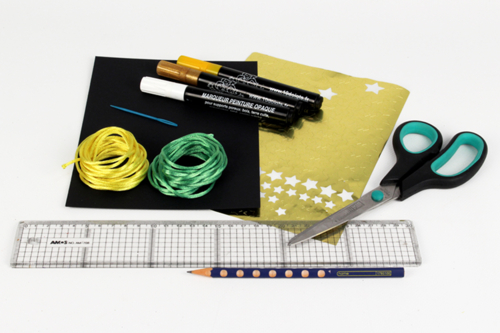
Here is the list of materials needed to create a Christmas tree embroidery card:
- a sturdy black card (half A4 size)
- a green satin ribbon (length: 2 meters)
- a yellow satin ribbon (length: 1.5 meters)
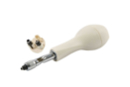
- a plastic needle
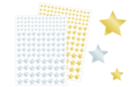
- metallic star stickers
- opaque paint markers
- hole punch
- ruler
- pencil
- scissors
Etape 2.
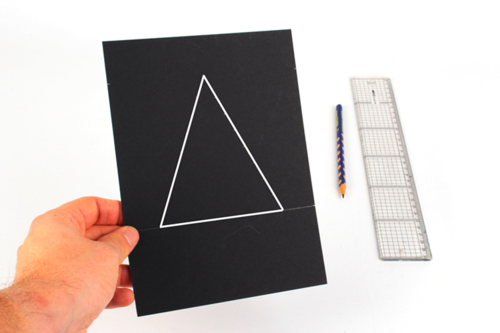
Cut a strong black A4 card in half and then draw a triangle.
Base of the triangle = 10 cm
Height of the triangle = 12 cm
Etape 3.
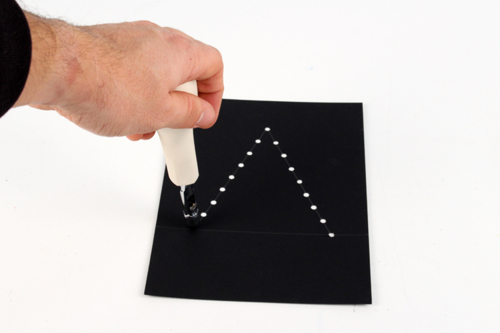
Using a hole punch, make Ø4mm holes spaced 1.5 cm apart on both sides of the triangle.
Etape 4.
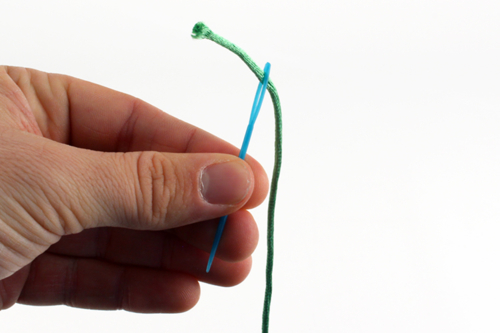
Insert the green satin cord (length = 2 m) through the eye of the plastic needle.
Let it stick out about 5 cm.
Etape 5.
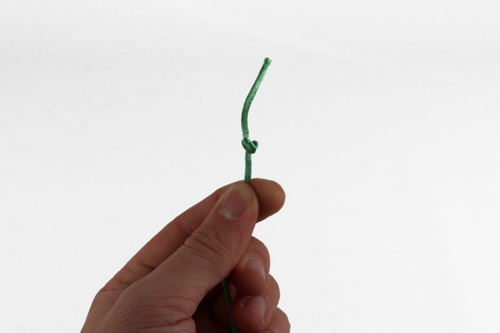
Make a double knot on the other end of the green cord.
Etape 6.
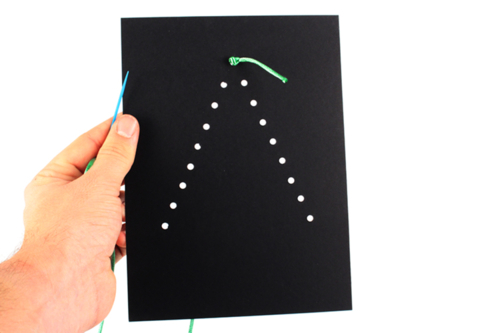
Pass the needle and thread through the hole at the top of the triangle.
The needle should enter from the back of the card (the side where the marks are still visible) and come out from the front of the card.
Etape 7.
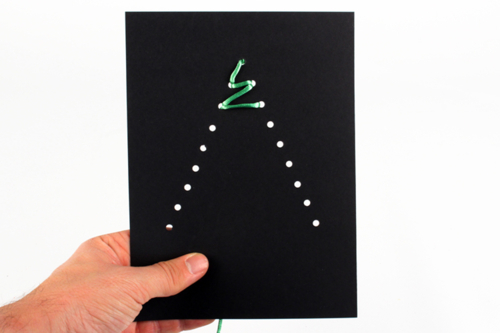
Embroider starting from the top and working down to the base by forming "Z" shapes (see photo on the right).
Etape 8.

Once at the bottom of the triangle, the Christmas tree should appear as shown in the photo on the right (front view).
Etape 9.
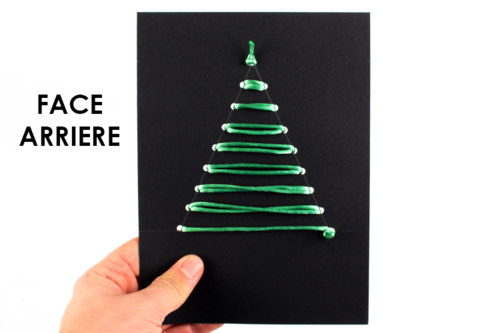
Here is a preview of the back side at this stage.
To secure the braiding, make a double knot with the cord (on the back side of the card) at the last hole.
Etape 10.
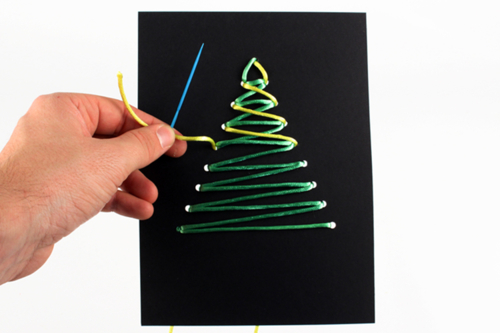
With the green cord weaving complete, create a "diagonal" weave with the yellow cord (see photo on the right).
Start the weaving from the hole at the top of the tree and gradually work your way down.
Etape 11.
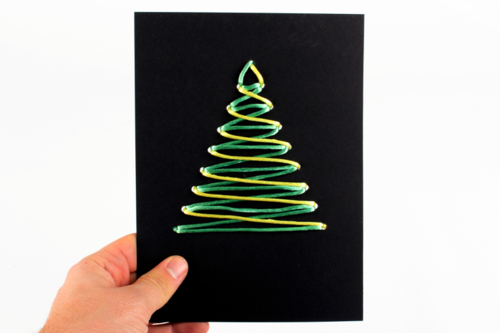
Here is the result you should achieve once the braiding with the yellow cord is complete.
Etape 12.

Stick a metallic star sticker on top of your little Christmas tree.
Etape 13.
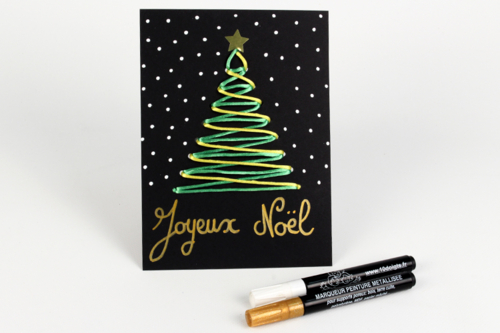
Using a white paint marker, make small dots all around the tree to imitate falling snow.
With a different colored paint marker (yellow, gold, ...), write a small message to personalize your card.
Etape 14.
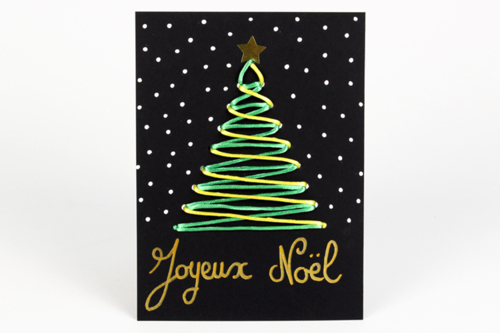
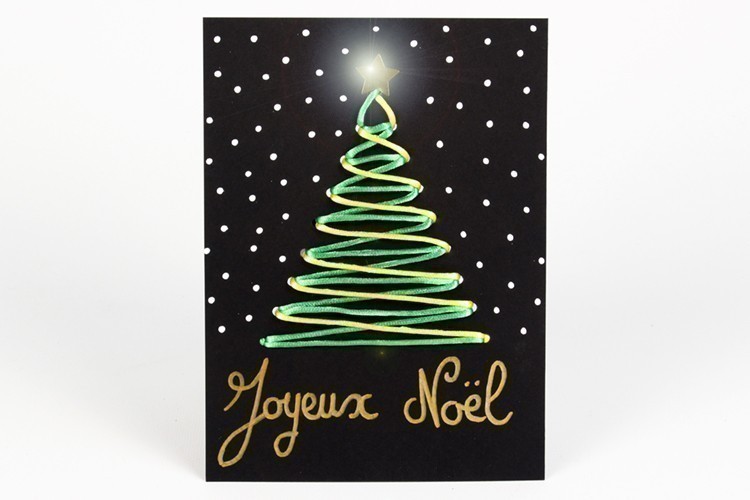
Your card is complete!
All that's left is to give it as a gift during the year-end holidays.
The originality of this card will surely leave an impression!
The products used:
The products used:

3,59€ (either 0,36 € / pc)
Available


Hexagonal HB Lead Pencils - Pack of 12
Réf. 01007 - Product sheet
1,79€ (either 0,15 € / pc)
Available
1,39€
Available
1,89€
Available

Other tutorials on the theme "Card Making Tutorials"
-


Pom Pom Flower Bouquet
C17682View 7016 time


-
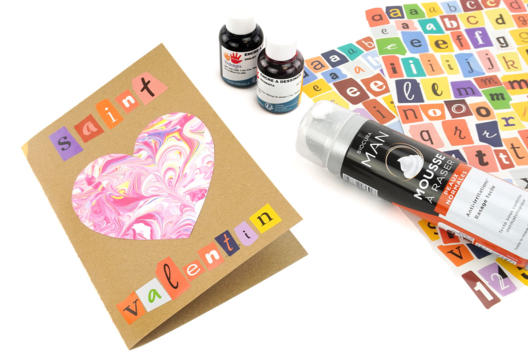
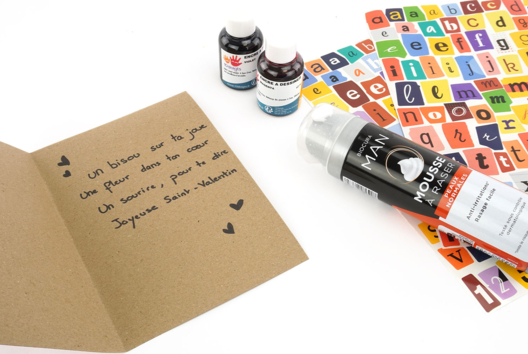
Marbled Valentine's Day Card - Shaving Foam
C17664View 4197 time
-


Flower Bouquet Card
C12203View 36021 time
-

Lottery Ticket for Mother's Day
C12202View 16850 time
-


Butterfly Magnet with a Clothespin
C12201View 24795 time -

Elephant Card
C12172View 15869 time
Avis client
5.0/5
3 avis publiés
5
100%
4
0%
3
0%
2
0%
1
0%
Customer review
Magnifique
Préparation très rapide. Ma fille de 7 ans l'a faite toute seule. Qualité des cordons +++
Magnifique
Préparation très rapide. Ma fille de 7 ans l'a faite toute seule. Qualité des cordons +++
Préparation très rapide. Ma fille de 7 ans l'a faite toute seule. Qualité des cordons +++