Your cart is empty.
Christmas Tree Place Card
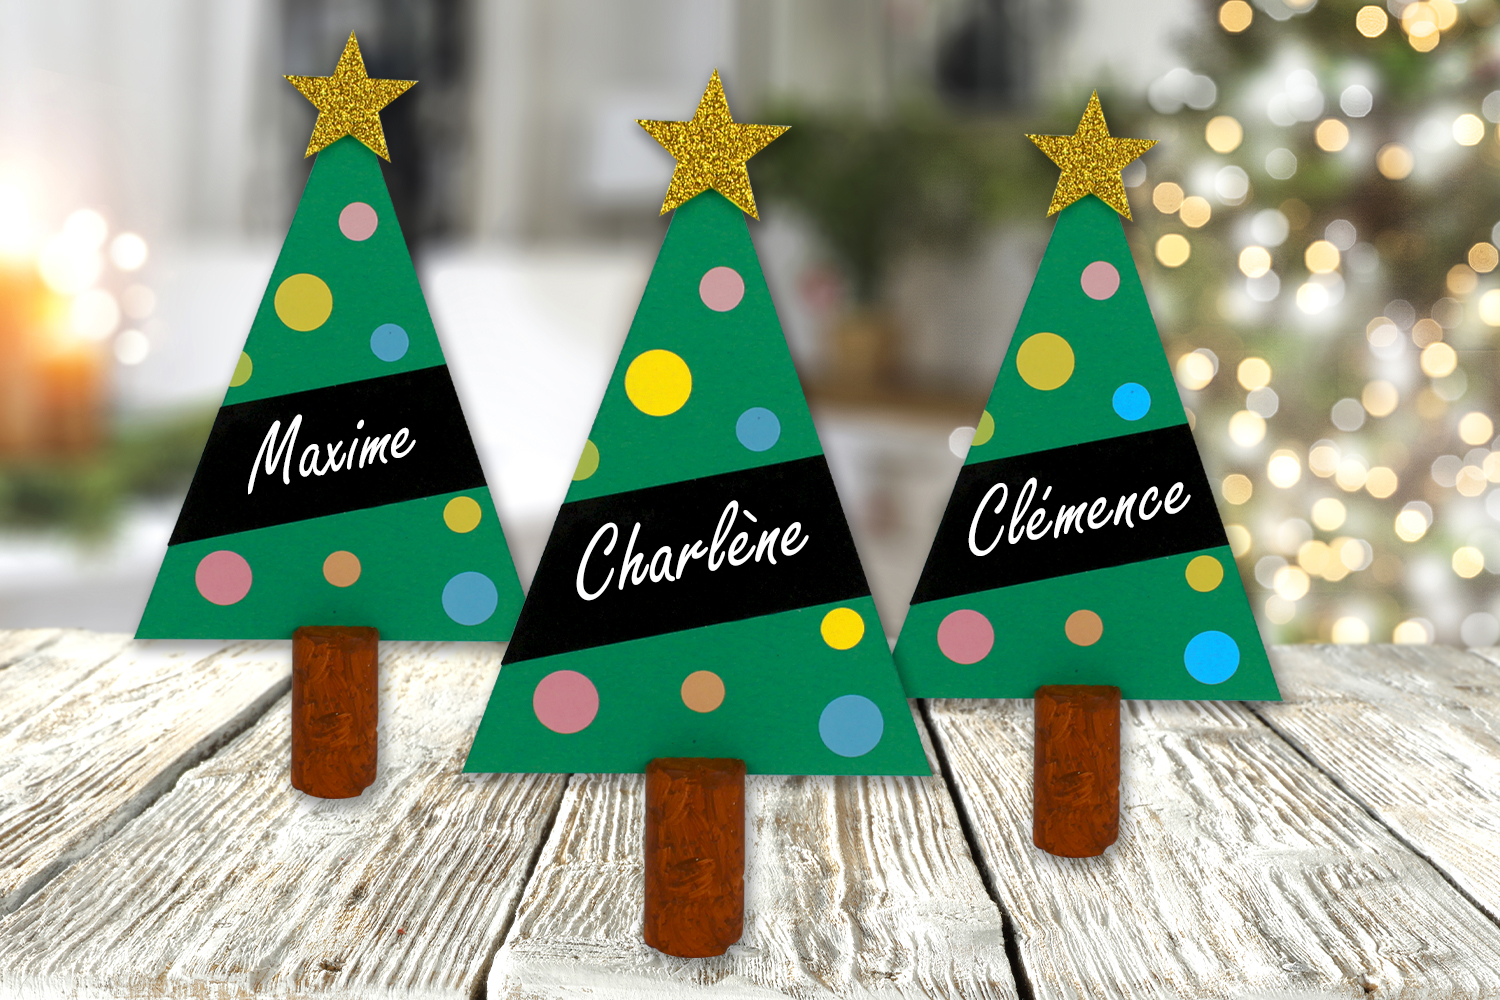
Christmas Tree Place Card
Discover a simple trick to create original place cards using a cork, paper, and stickers.
These tree-shaped place cards will be perfect for your holiday meals!
Thèmes de l'idéa créa :
#Holiday Tables
How to complete this tutorial step by step?
Etape 1.
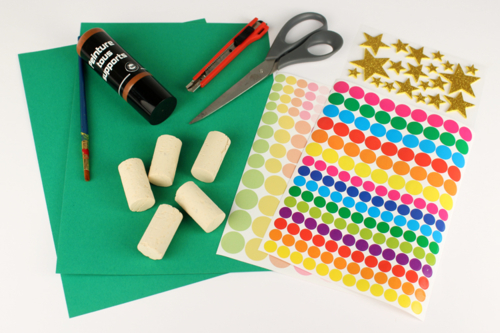
To make a Christmas tree place card, you will need:
- a sturdy green card (300 g/m²)
- a pair of scissors
- a wine cork
- a craft knife
- brown acrylic paint + a paintbrush
- round stickers
- a star sticker
- a sheet of self-adhesive blackboard paper
- a white gel pen
Etape 2.
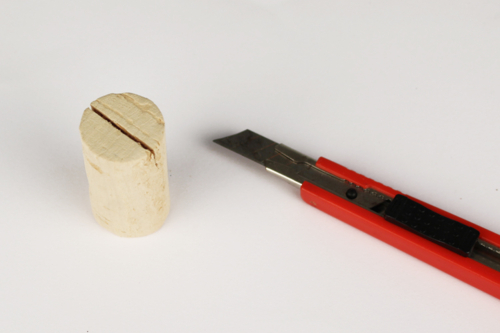
Using a craft knife, make a cut about 1 cm deep at the top of a cork stopper.
The cork will serve as the trunk of the Christmas tree.
Etape 3.
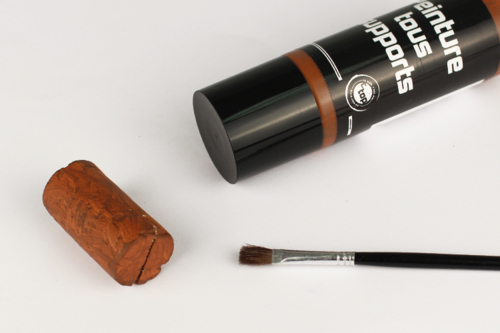
Paint the cap with brown acrylic paint and let it dry for about 10 minutes.
Etape 4.

Cut a triangle with a base of 11 cm and a height of 15 cm from a strong green card (300 gsm).
Etape 5.
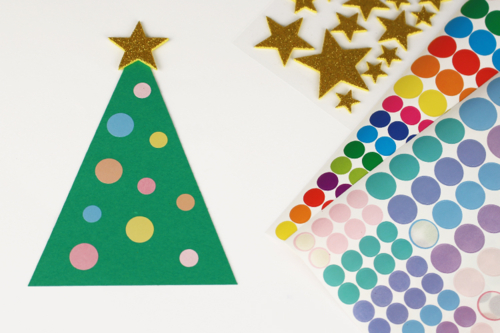
Decorate the tree with circular stickers and add a star sticker to the top.
Etape 6.
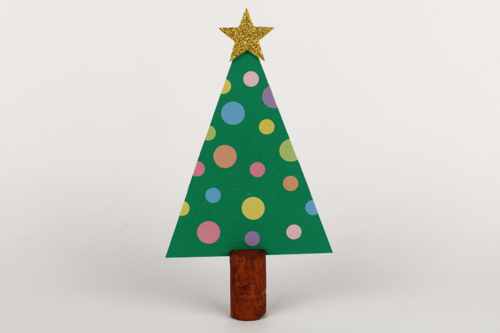
Insert the top part of the fir tree into the slot located at the top of the cork stopper.
Etape 7.
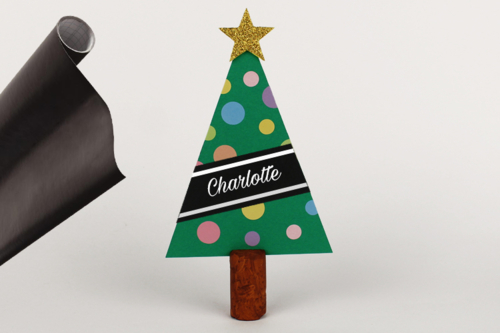
To turn the Christmas tree into a place card, here's a little tip:
- Cut a strip of self-adhesive blackboard tape 3.5 cm wide and stick it on the tree, slightly at an angle.
- Adjust using a pair of scissors.
- Then write the names of the guests with a white gel pen.
The products used:
The products used:


2,99€ (either 1,00 € / pc)
Available

3,59€ (either 0,36 € / pc)
Available

3,59€ (either 0,36 € / pc)
Available


1,99€ (either 1,00 € / pc)
Available


Other tutorials on the theme "Holiday Tables"
-


Pipe Cleaner Christmas Tree
C17464View 4977 time


-


Little Light-Up Christmas Tree
C17460View 2269 time

-


Rudolphs made from corks
C12433View 96326 time -

Conical Snowman
C11926View 19887 time -

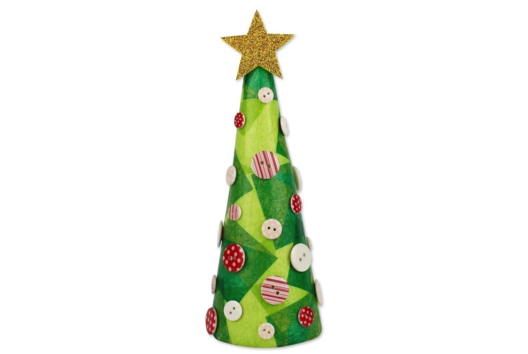
Cone Christmas Tree
C11924View 57193 time -

Rock Painting for Christmas
C11923View 26651 time
Customer review
Give your feedback
Christmas Tree Place Card
Be the first to share your review of this product.
Post a review