Your cart is empty.
Christmas Tree with Paper Strips


Christmas Tree with Paper Strips


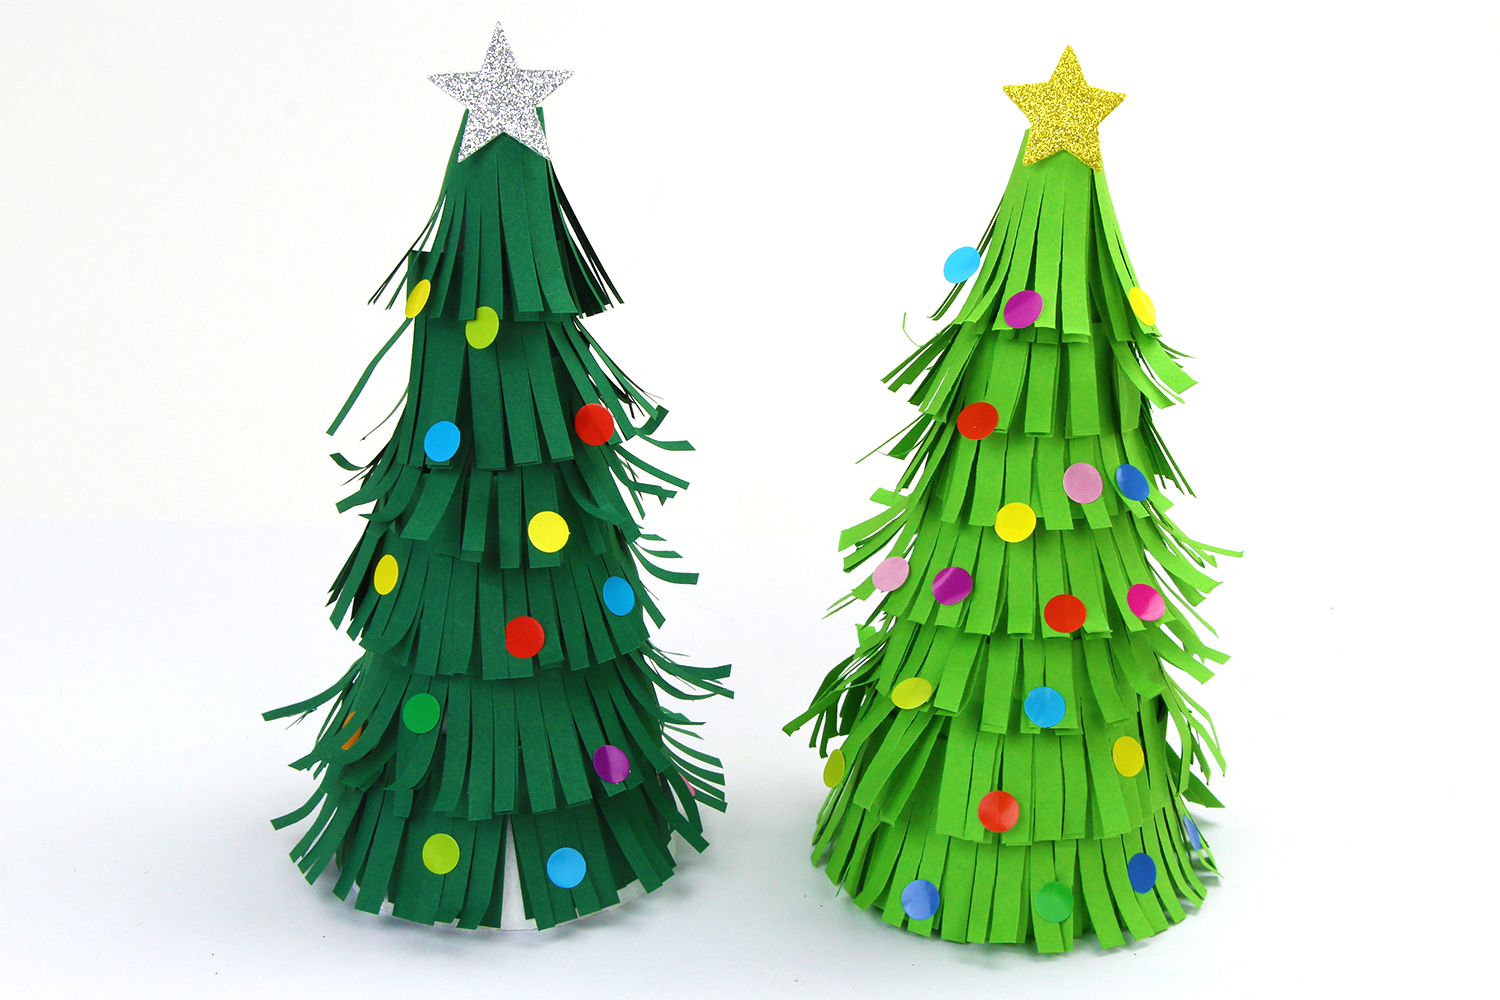
Discover a simple method to create decorative Christmas trees using just foam cones, paper, and stickers!
Activity to be done with the help of an adult.
How to complete this tutorial step by step?
Materials:
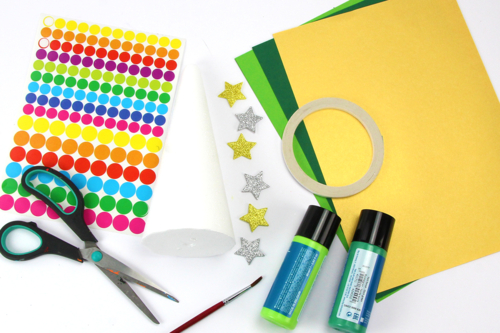
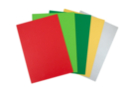
To make a Christmas tree, you need:
- A polystyrene cone
- A4 paper sheets in Christmas colors (130 g/m²)
- Colored round stickers
- A glittery adhesive star
- Light green and dark green paint + a brush
- A pair of scissors
- Double-sided adhesive tape
Step 1:
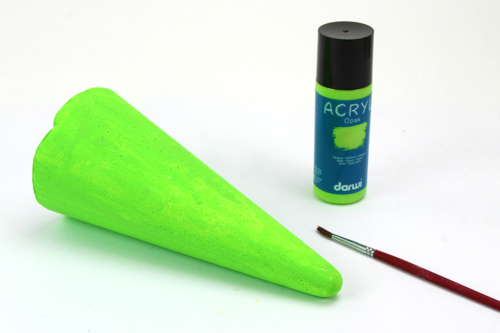
To start, paint the polystyrene cone in light or dark green.
Then let it dry for 30 minutes
Step 2:
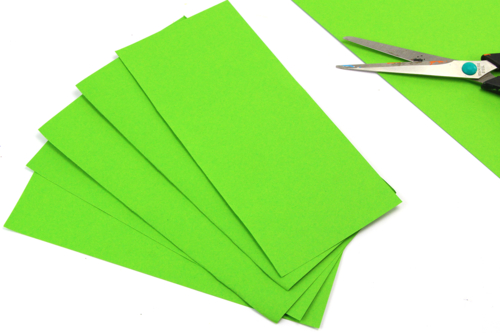
Cut 6 strips of 10 cm x 29.7 cm from light green or dark green paper sheets.
Step 3:
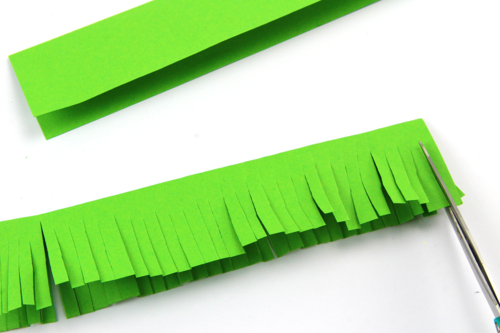
Fold the rectangles in half and cut fringes as shown in the photo.
Step 4:
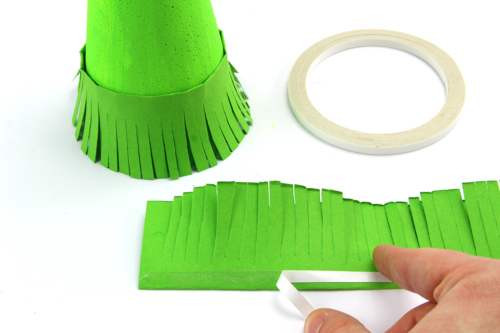
Place a double-sided adhesive strip on the paper strip and then stick it around the cone.
Étape 5 :
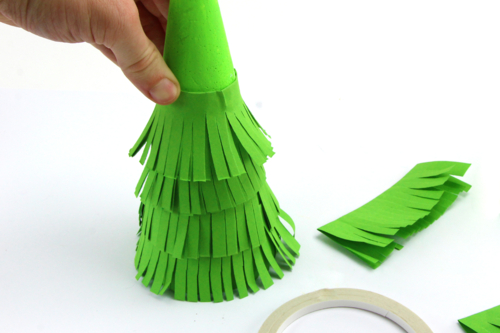
Layer the strips of paper to achieve this result.
Tip: Shorten the length of the strips as you move up towards the top of the cone.
Step 6:
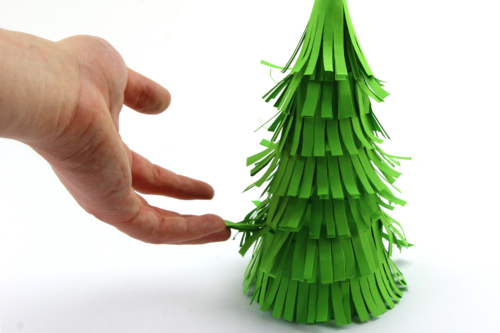
Once the cone is covered, bend the ends of the paper strips to add volume to the tree..
Step 7:

Glue a sparkling adhesive star to the top of the tree.
Step 8:
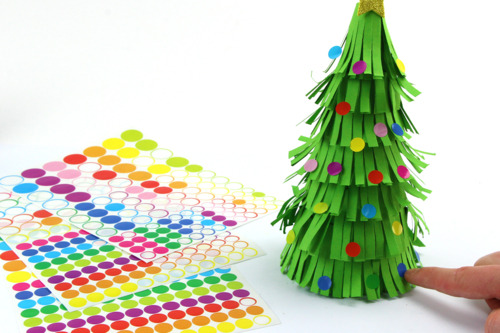
Stick colorful round stickers on the Christmas tree to create a "Christmas ball" effect.
The products used:
The products used:

8,94€ (either 1,49 € / pc)
Available


2,99€ (either 1,00 € / pc)
Available


Other tutorials on the theme "Christmas Tutorials"
-


Chalkboard "Happy New Year"
C17575View 3022 time


-


Pipe Cleaner Christmas Tree
C17464View 4920 time


-


Santa Claus and His Macramé Beard
C15412View 36279 time
-

Christmas Lantern with Small Characters
C11041View 35831 time
-


Christmas Chalet with Sticks
C11039View 77985 time
-

Santa Claus in the Chimney
C10997View 15833 time
ce bricolage peut être génial pour les enfants qui expérimentent le découpage