Your cart is empty.
Glitter Christmas Bauble with Photo

Glitter Christmas Bauble with Photo
Discover a Christmas tutorial where children will be the stars!
Today, we will teach you how to make a snow globe for the Christmas tree in which children can insert their photo.
An easy and fun craft that everyone will love!
Thèmes de l'idéa créa :
#Christmas Tutorials
#Christmas Ornement
#I'm Making a Snow Globe for Christmas
How to complete this tutorial step by step?
Material:
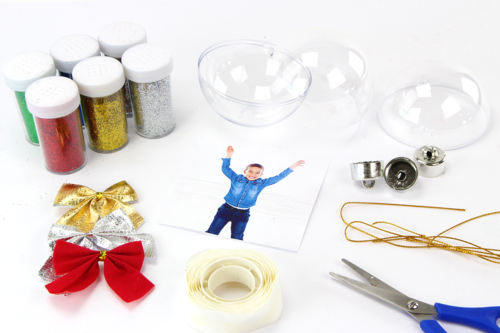
To make a Christmas ball, you need:
- A printer
- A photo
- A transparent plastic ball Ø 8 cm
- Glitter to sprinkle
- A large fabric ribbon
- Adhesive gel dots
- A pair of scissors
Step 1:

To start, choose a photo of your child raising their arms or set up a small photo shoot specifically for the activity.
Step 2:
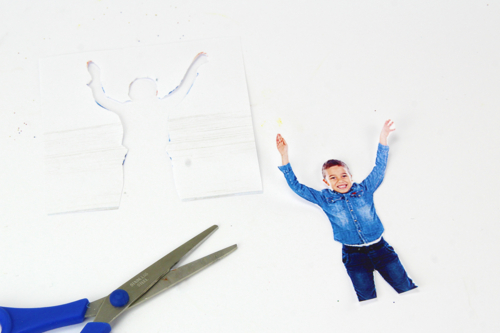
Print the selected photo with the following dimensions: 6x6 cm maximum.
Then cut out the outline of the photo.
Step 3:
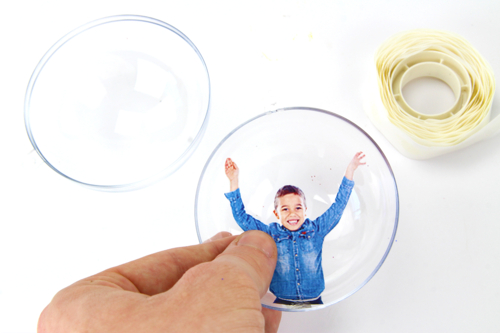
With a sticky gel dot, attach the cut photo inside a half-sphere like this.
Step 4:
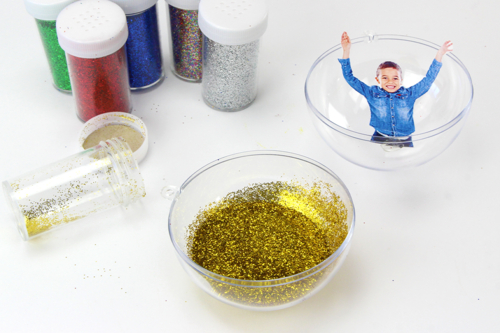
In the other semi-bowl, pour in the colored glitter.
Step 5:
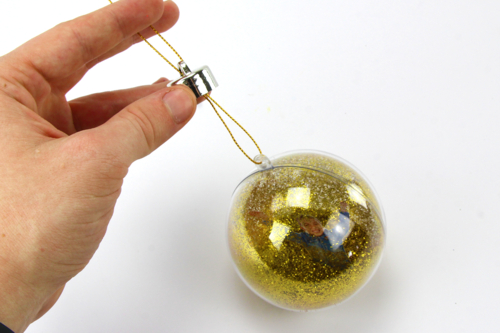
Close the plastic ball and pass a golden string through the hole provided for this purpose.
Pass the string through the silver “hat”.
Step 6:
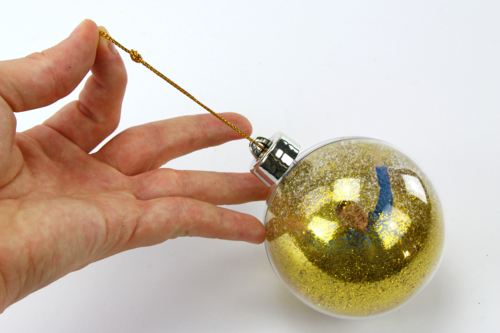
Tie the cord using a double knot.
Step 7:
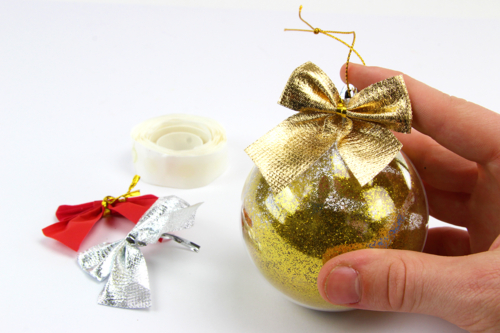
Finally, stick a fabric bow on the silver “hat” with a piece of adhesive gel.
Tip: Here, we chose to match the color of the bow with the color of the glitter.
The products used:
The products used:

Plastic balls ø 8 cm - 10 pieces
Réf. 13064 - See the full range
6,90€ (either 0,69 € / pc)
Available


3,49€
Available from 22/06/2026

Other tutorials on the theme "Christmas Tutorials"
-

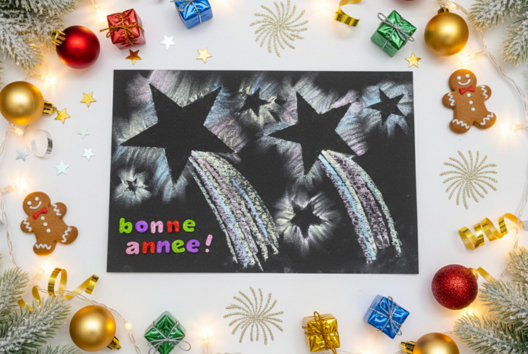
Chalkboard "Happy New Year"
C17575View 3006 time


-
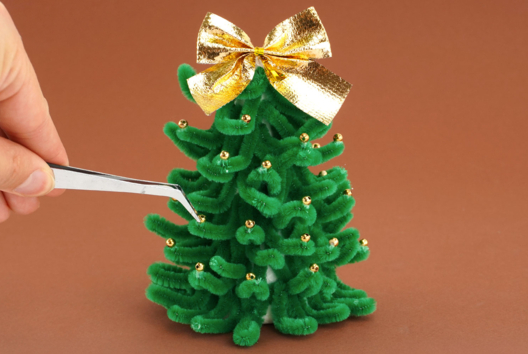

Pipe Cleaner Christmas Tree
C17464View 4903 time


-
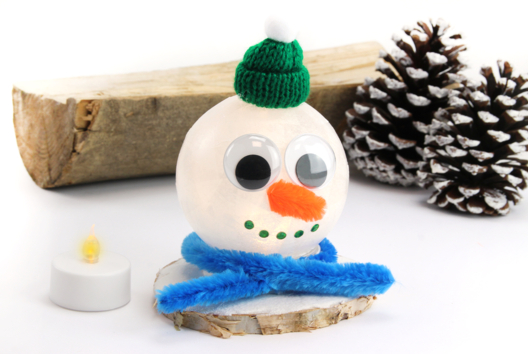
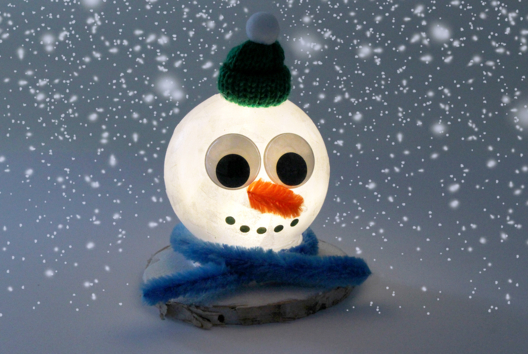
Illuminated Snowman Head
C14941View 19258 time
-
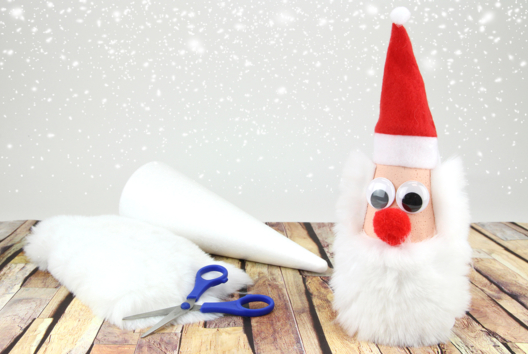
Santa Claus and His Soft Beard
C14933View 20105 time
-
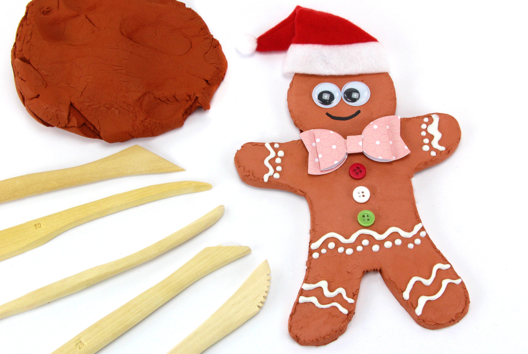
Gingerbread Man (modeling dough)
C14862View 36333 time
-
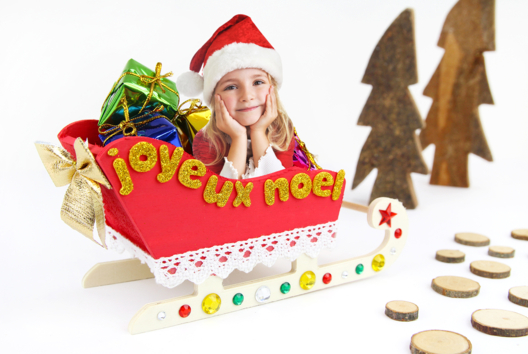
Customizable Christmas Sleigh with a Photo
C14844View 22575 time
Customer review
Give your feedback
Glitter Christmas Bauble with Photo
Be the first to share your review of this product.
Post a review