Your cart is empty.
Initial Notebooks Linocut
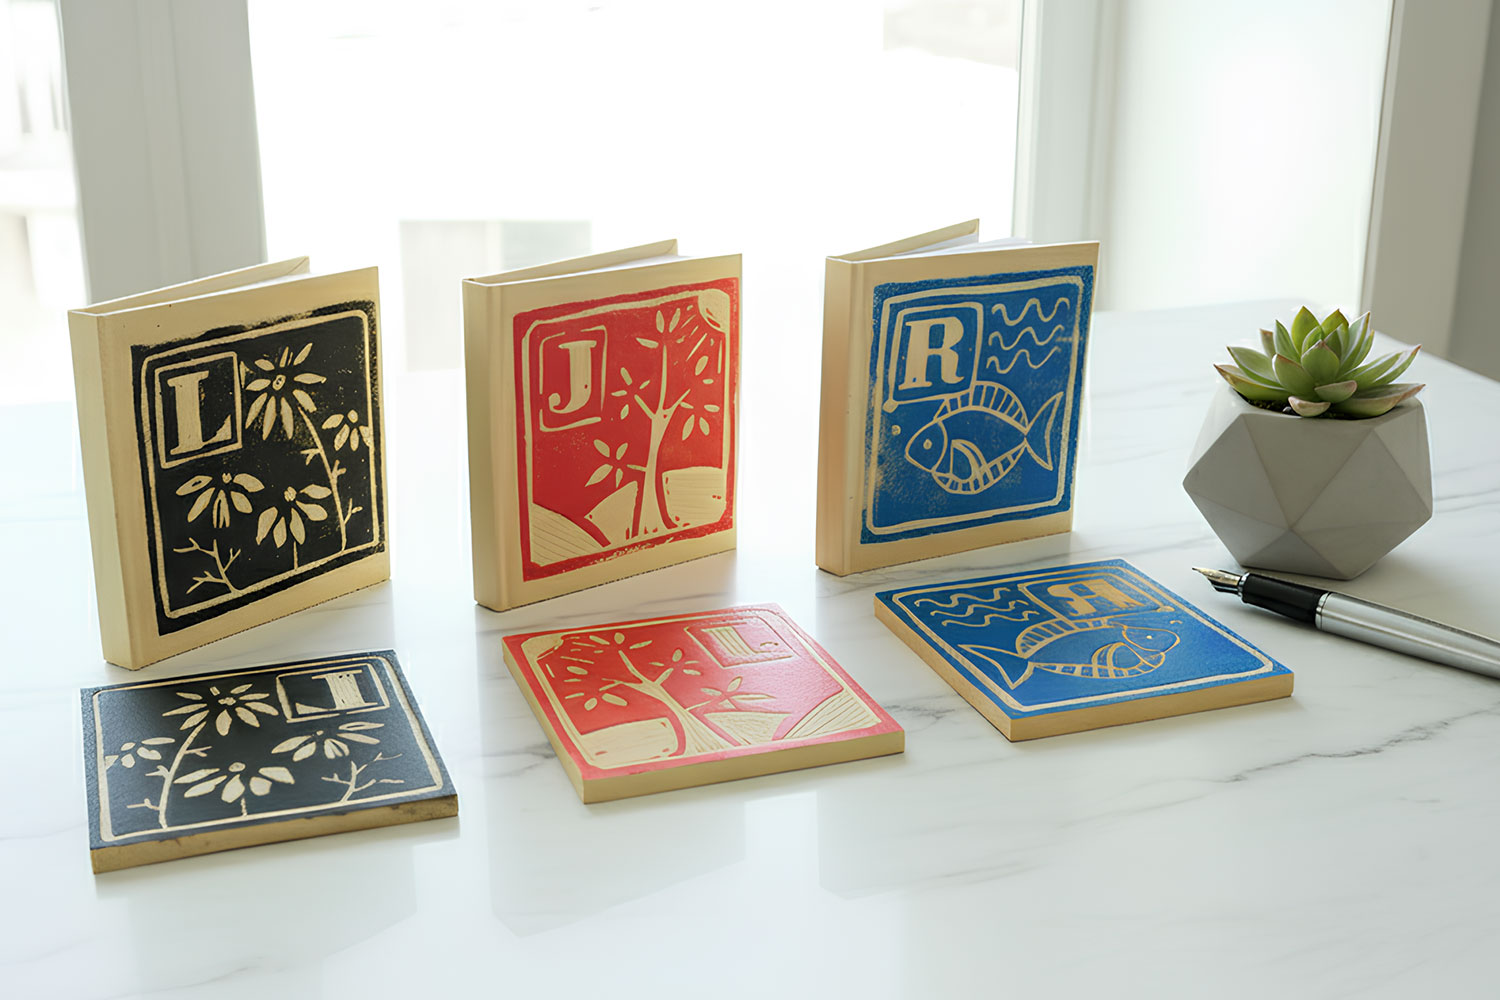
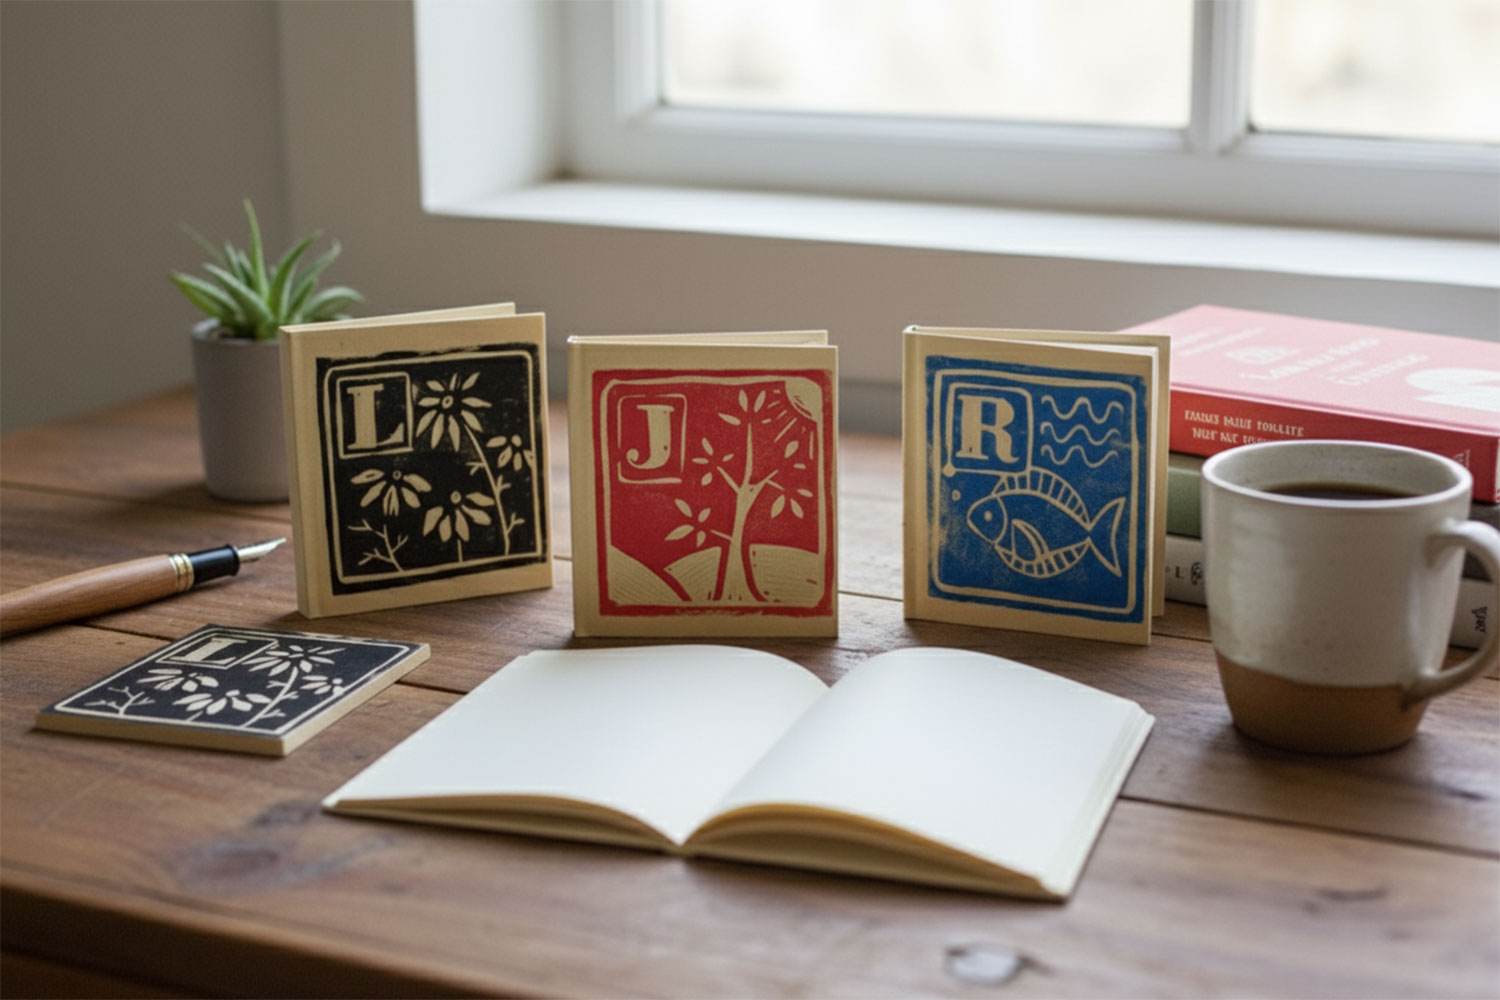

Initial Notebooks Linocut


Want to add an artistic and unique touch to a notebook? Linocut is a handmade printing technique that allows you to easily create beautiful patterns for reproduction on paper, textiles, or objects.
In this tutorial, we will create a step-by-step engraving of a fish and a letter, which we will then print on the cover of a notebook.
Thèmes de l'idéa créa :
#Painting Tutorials
#Engraving Tutorials
#Adult Tutorials
#I paint with stencils
How to complete this tutorial step by step?
Step 1 – Transfer the design onto the block
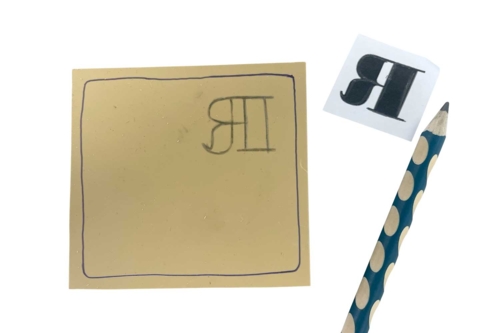
Cut the block to have a surface of 9 x 9 cm.
Start by drawing a frame on the linoleum block. Then, transfer your design (text, drawing, or image) while ensuring to trace it in reverse, as the print will be flipped.
Step 2 – Draw the Decor
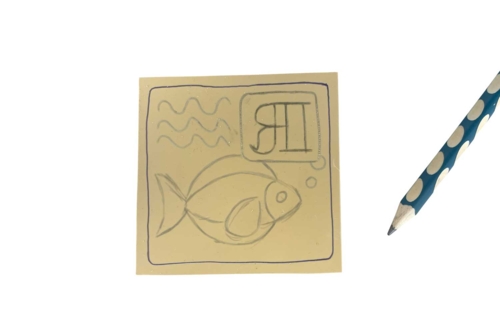
Complete the drawing with decorative elements (here, a fish, waves, and a bubble) to achieve a harmonious composition.
Step 3 – Carve the Plate
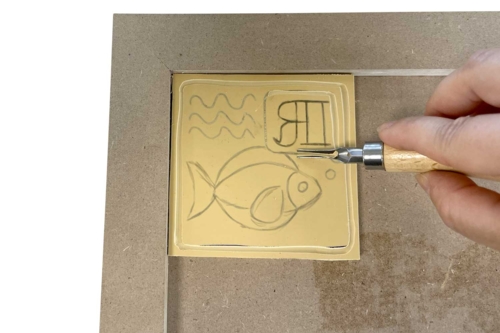
Using a gouge, start to carve the outline of your design, then hollow out the areas that should remain white during printing. Work carefully, following the lines.
Step 4 – Finalize the engraving
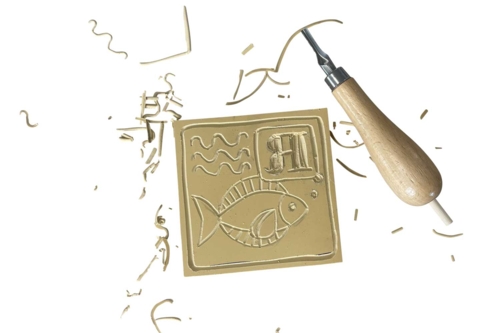
Continue removing pieces of linoleum until you achieve a clear relief: only the non-carved areas will be inked and visible during printing.
Step 5 – Inking the Plate

Spread ink on a smooth plate (metal, glass, or plastic). Roll over it to evenly distribute the ink, then apply it uniformly to the engraved surface.
Step 6 – Print the Pattern
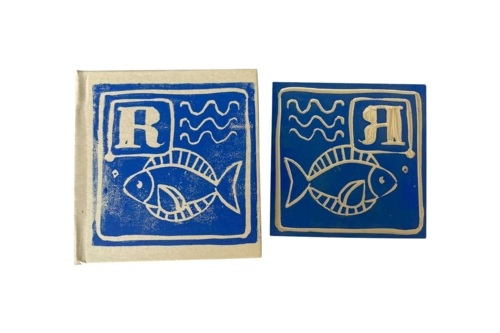
Gently place the inked plate on the cover of the notebook and press down firmly. Remove it: your pattern is printed!
The products used:
The products used:


Other tutorials on the theme "Engraving Tutorials"
-


Embossed Metal Christmas Ornaments
C17434View 17704 time


-


Easy Linocut for Kids
C17098View 10183 time

-

Engraved Metal Mirror
C11800View 9253 time -
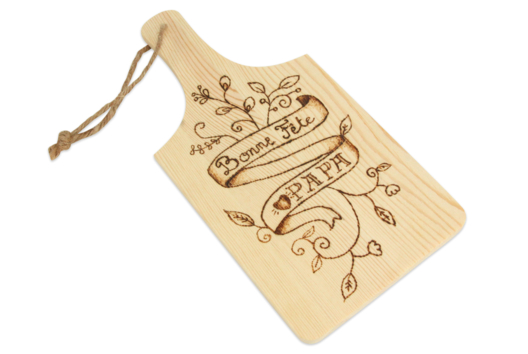
Father's Day Cutting Board
C14092View 17623 time -

Heart-Shaped Metal Embossing Box
C10931View 8854 time
-
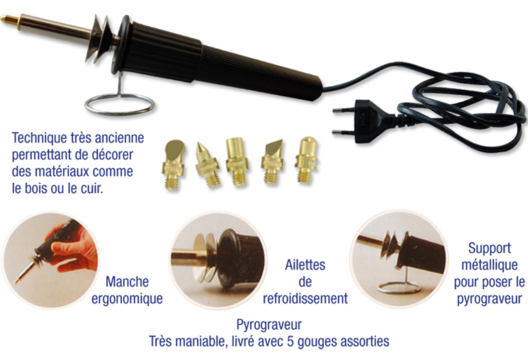

Wood Burning Technique
C11253View 12015 time
Customer review
Give your feedback
Initial Notebooks Linocut
Be the first to share your review of this product.
Post a review