Your cart is empty.
Pine Cone Christmas Tree
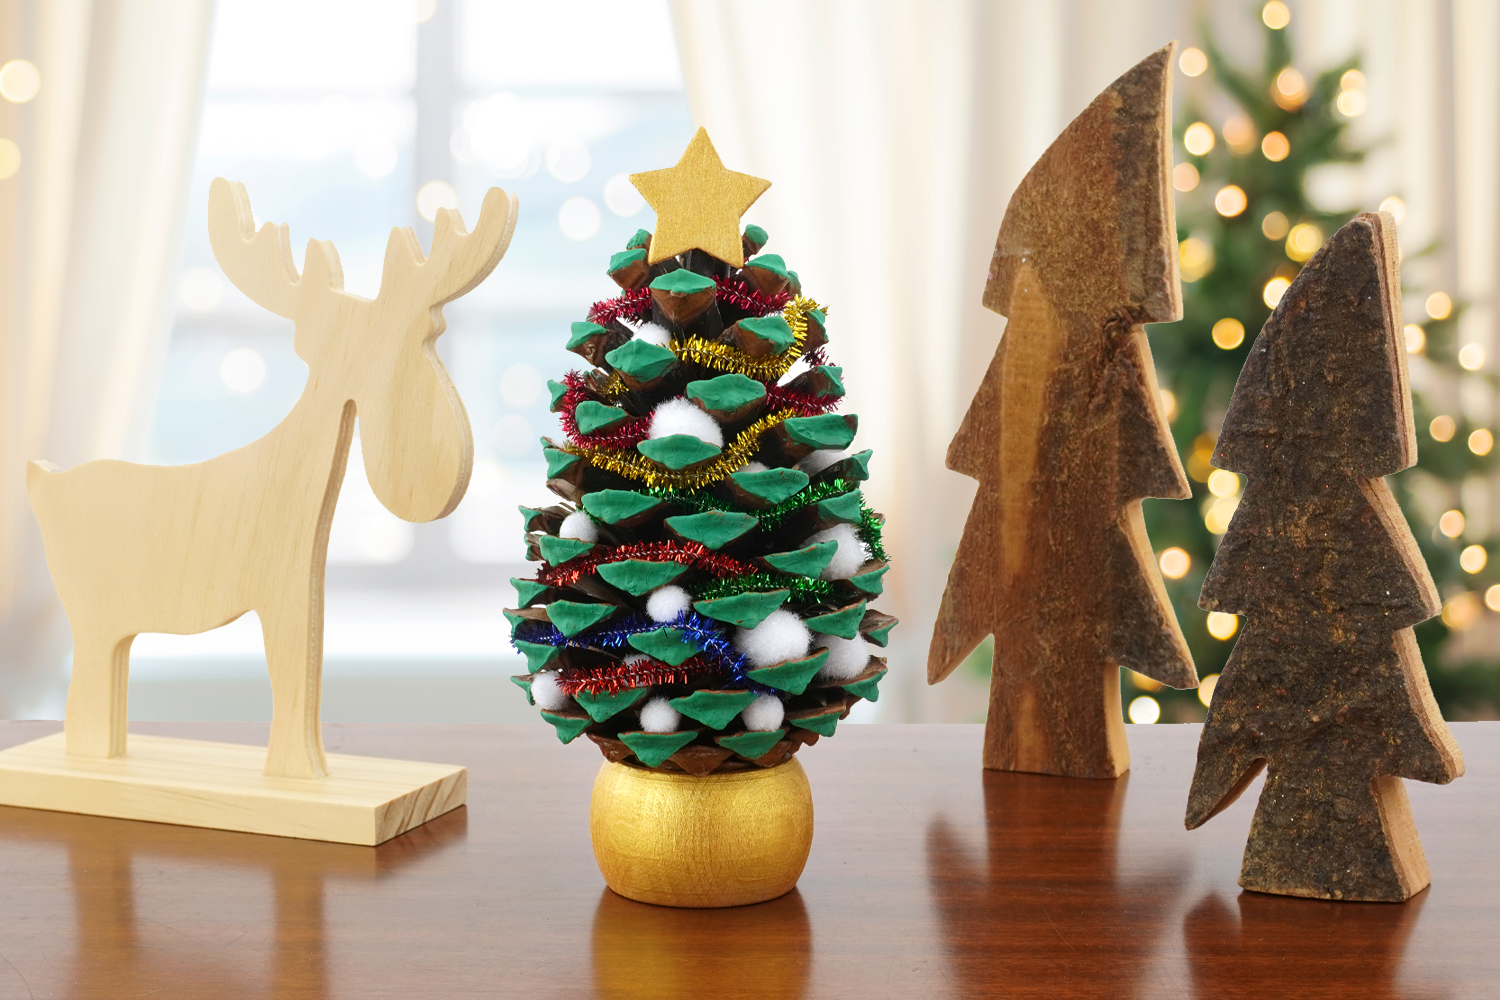
Pine Cone Christmas Tree


Turn a pine cone into a beautiful miniature Christmas tree!
It's easy and fun: children will only need a bit of paint, some sparkly pipe cleaners, and small white pom-poms to create this creative activity! This lovely little tree made with care will be perfect for decorating the home and festive tables.
A perfect craft to develop children's creativity while having fun!
How to complete this tutorial step by step?
Materials
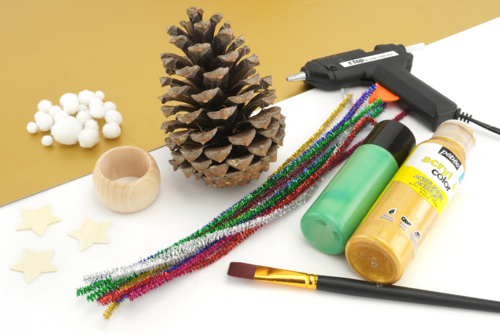
To create a miniature Christmas tree, you will need:
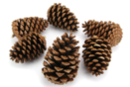
- a large pine cone (10 to 15 cm)
- a wooden napkin ring
- acrylic paint (dark green, gold)
- a paintbrush
- a wooden star
- metallic pipe cleaners
- small white pom-poms
- a glue gun
Step 1
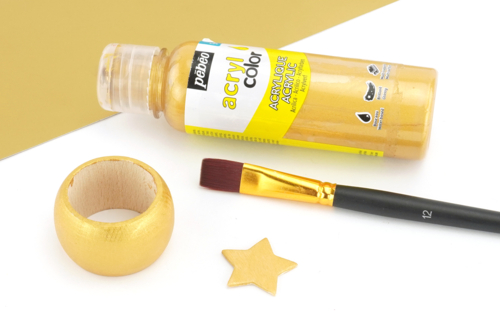
Paint the napkin ring and a 3.5 cm wooden star with golden paint.
Step 2
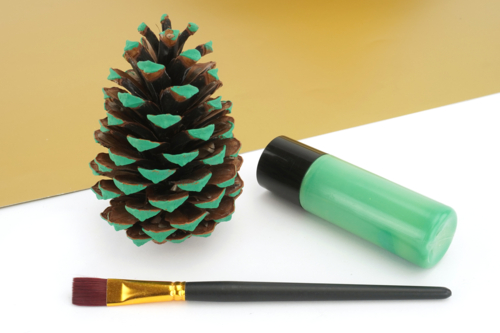
Paint the tips of the pine cone scales with dark green paint.
Step 3
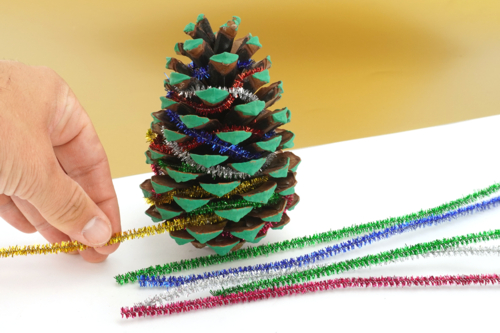
Decorate the pine cone by inserting colorful metallic chenille stems between the scales to create a garland effect.
Step 4
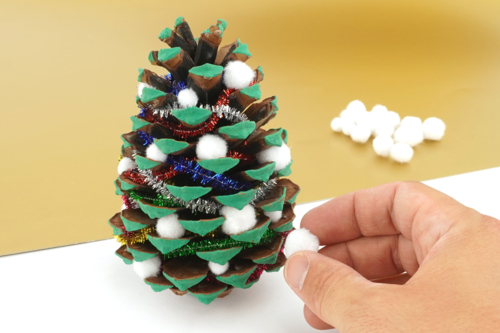
Place small white pom poms between the scales of the pine cone to create a beautiful snowy effect.
Step 5
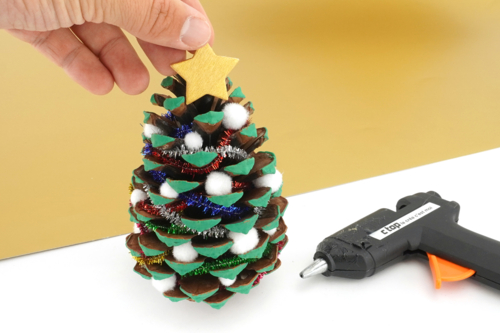
Glue the golden star to the top of the Christmas tree using the glue gun.
Step 6
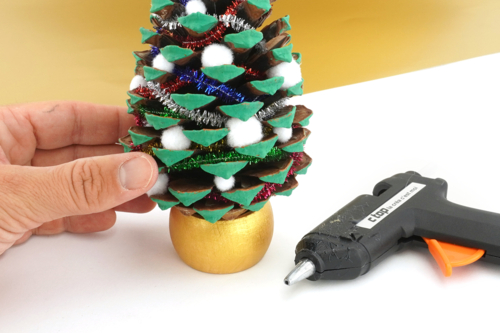
Glue the pine cone onto the napkin ring to create a beautiful base.
The products used:
The products used:


2,99€ (either 1,00 € / pc)
Available

3,99€
Available


Other tutorials on the theme "Christmas Tutorials"
-


Chalkboard "Happy New Year"
C17575View 3083 time


-


Pipe Cleaner Christmas Tree
C17464View 4982 time


-


Hanging Little Elves for the Christmas Tree
C11022View 45919 time
-
Little Penguins on the Ice Floe
C10984View 18673 time
-


Christmas Stars with Cardboard Straws
C11013View 11224 time
-


Christmas Reindeer with a Cardboard Roll
C10966View 36467 time
-
Driftwood Reindeer
C14820View 10942 time -

Glitter Christmas Bauble with Photo
C14812View 46936 time -

Photo Tree
C14607View 14159 time -

Christmas Reindeer Pom Pom
C14284View 112639 time
Customer review
Give your feedback
Pine Cone Christmas Tree
Be the first to share your review of this product.
Post a review